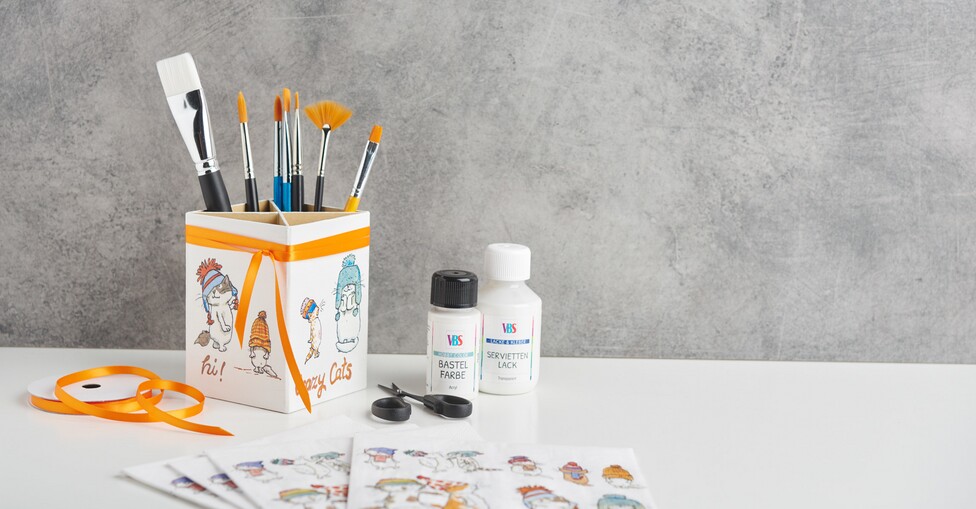
How the napkin technique works
1. Priming
To prime the pencil quiver white, please apply an evenly thin layer of craft paint with a brush. Allow the first coat of paint to dry thoroughly. Since this is a highly absorbent surface, you may need another coat this way. This will give you a more thorough application of paint. Thoroughly wash out the brush for the next step and allow to dry.
2. Fix the napkin motifs
Next, glue on the napkin motifs. To do this, cut out the desired napkin motif with the silhouette scissors.
Then remove the two unprinted layers of the napkin and place the motif on the pen holder. Now take the dried soft napkin brush to hand and coat the napkin from the inside to the outside with napkin varnish.
Let it dry well.
Finally, decorate with the satin ribbon.
Tip: To remove the unprinted layers of the napkin, simply stick a small strip of adhesive film on it and peel it off again.For example, craft individual pencil quiver with your children to store felt-tip pens, colored pencils, drawing pencils, rulers and much more. The pencil quiver can be placed very nicely on the desk.
Translated with www.DeepL.com/Translator (free version)