- Secure order
- Easy return shipment
- Service-Hotline 04231 - 66811Mo.-Fr. 9 - 17 h
Instructions No. 3152
Difficulty: Beginner
Working time: 3 Hours
Firstly, protect your work area with a handicraft mat.
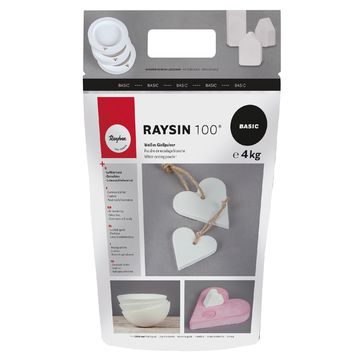
To start your project, mix Raysin with water to make a creamy paste. Make sure you follow the instructions on the packet exactly: Mix 280 ml of water with 1 kg of the powder to produce about 650 ml of casting compound. This mixture, in which the mixing ratio is one part water to 3.5 parts powder, ensures the best consistency.
Carefully pour the casting compound into your prepared moulds.
To ensure your result is flawless, tap the moulds lightly on the surface - this helps to remove trapped air bubbles and ensures a smooth, even finish.
After leaving the casts to air for about an hour, you can carefully remove them from the mould. It is important to allow the mouldings to dry completely to ensure stability. If you notice that the edges are a little uneven, they can be sandpapered afterwards to achieve a perfect finish. And don't forget: Clean the moulds thoroughly so that they are ready for your next project!
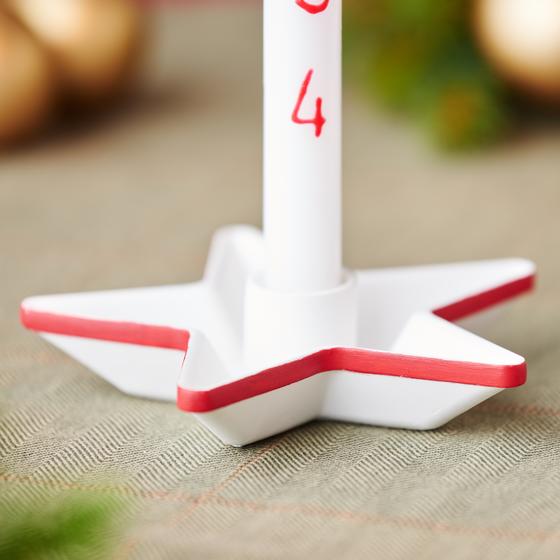
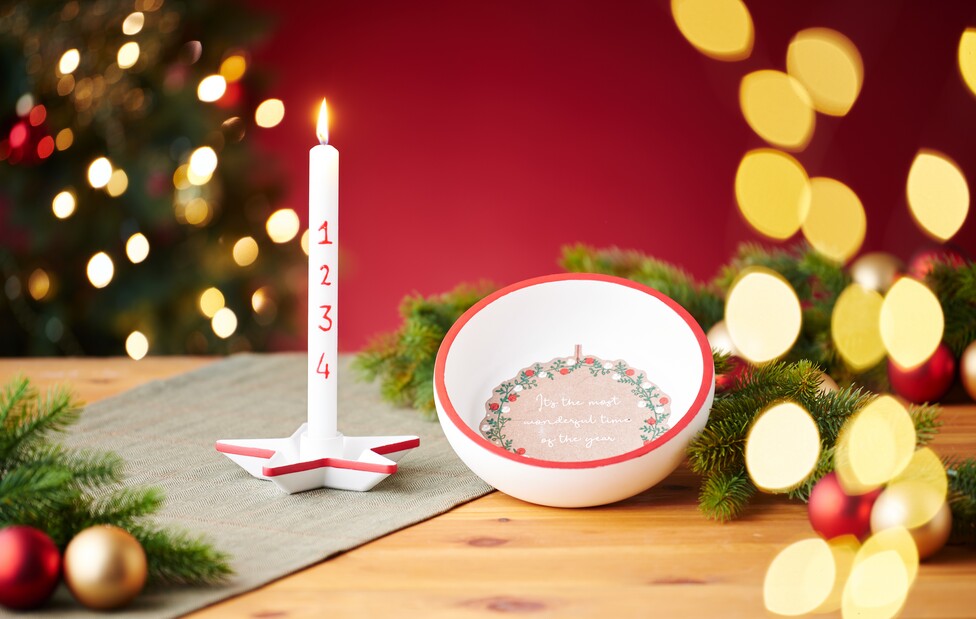
Once the base is ready, you can decorate the edges of your castings with colourful craft paint to suit your taste.
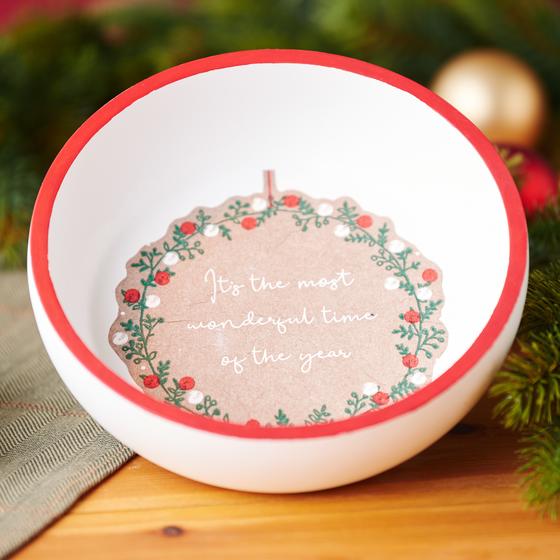
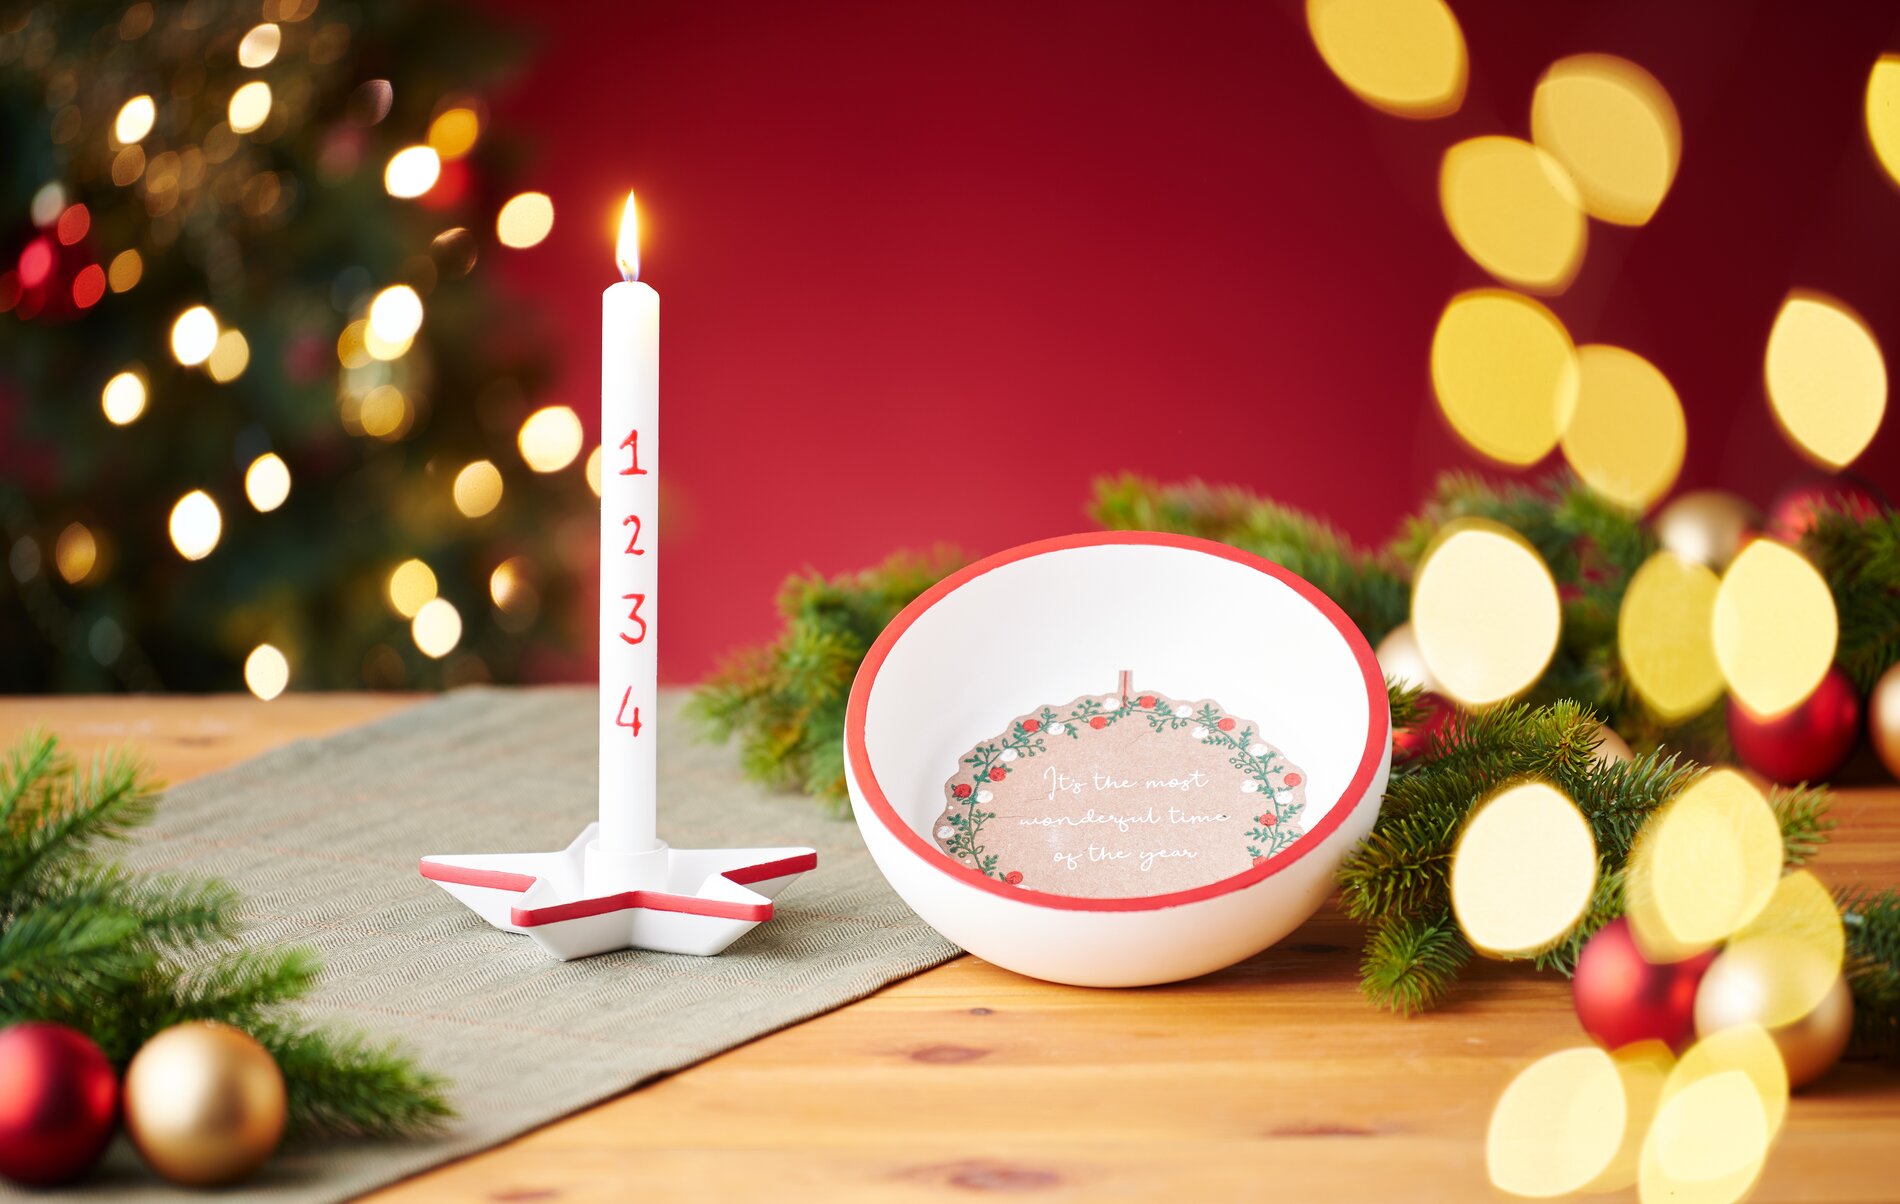
Decorate your stick candle for the finishing touch. If the candle is too big for the holder, a candle sharpener is the ideal tool for cutting it to the desired size. For a secure hold, place an adhesive wax disc in the base of the mould. Use the napkin technique to decorate the bowl.
Cut the napkins to the right size, remove all unnecessary layers up to the top layer of the motif and place them carefully in the bowl. Apply the napkin varnish with a brush, starting in the centre of the napkin. Work your way to the edges to achieve an even, smooth surface. And you're done!