- Kauf auf Rechnung
- Sichere Bestellung
- Gratis Rückversand
- Bestell-Telefon 04231 - 66811
Anleitung Nr. 3215
Schwierigkeitsgrad: Einsteiger
Arbeitszeit: 2 Stunden

Schritt 1: Vorlagen übertragen
Lade dir die Vorlagenherunter. Lege sie auf das Moosgummi und fahre mit einem Bleistift die Umrisse nach. Achte darauf, das Moosgummi in gutem Licht zu positionieren, damit alle Linien deutlich zu sehen sind.
Schritt 2: Moosgummi ausschneiden
Mit einer scharfen Schere schneidest du die Umrisse deines Tieres vorsichtig aus dem Moosgummi aus. Versuche präzise zu arbeiten, damit die Form genau so wird, wie du es dir vorstellst. Solltest du jüngeren Kindern beim Basteln helfen, überwache diesen Schritt, um Unfälle zu vermeiden.
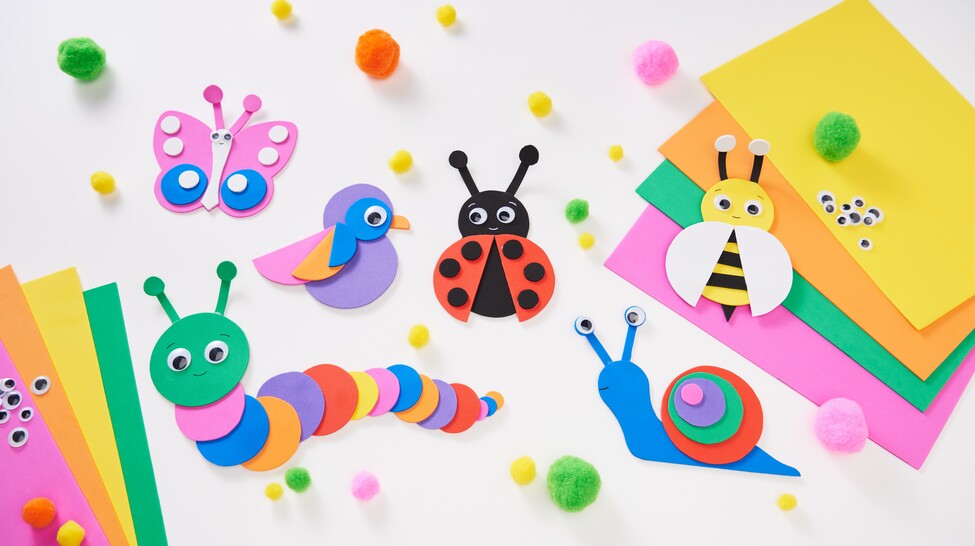
Schritt 3: Die Teile zusammenkleben
Nun, da du alle Teile deines Tieres ausgeschnitten hast, beginnt der spaßige Teil – das Zusammenkleben! Nutze Moosgummikleber, um die einzelnen Teile deines Moosgummi-Tieres aneinander zu befestigen. Zum Beispiel klebt beim Marienkäfer die Flügel auf den Körper oder befestige beim Schmetterling die Flügel an der Mitte. Lasse den Kleber ausreichend trocknen, um sicherzustellen, dass alles fest sitzt.
Schritt 4: Wackelaugen anbringen
Wackelaugen verleihen deinen Tieren ein lebendiges und verspieltes Aussehen. Klebe die Augen auf die vorgesehenen Stellen deines Moosgummi-Tieres.
Schritt 5: Gesichtszüge aufmalen
Zum Abschluss kannst du deinem Tier noch Persönlichkeit verleihen, indem du mit einem feinen Filzstift oder einem Permanentmarker Mund und Augenbrauen aufmalst.
Jetzt, da du alles über das Basteln mit Moosgummi weißt, ist es an der Zeit, deine eigenen Kreationen zum Leben zu erwecken. Egal ob alleine oder mit Freunden und Familie – dieser Bastelspaß sorgt garantiert für Freude und Begeisterung!